Here is the final edit of my thriller opening, Breath. Please comment your thoughts and enjoy!
Sunday 4 May 2014
Saturday 3 May 2014
Evaluation - Question 7
Looking back at your preliminary task, what do you feel you have learnt in the progression from it to the full product?
Here is a re-cap of my peliminary tasks:
- Continuity Task
A short clip practising different shots, and looking into how effective they are in portraying the idea of the scene. The clip starts by tracking someones feet whilst walking. Match on action shots were used when going through the door, cutting from frame to frame showing that no time has passed. Finally, the 180 degree rule is used to film the brief conversation between the two characters, having there head and shoulders in the foreground and the person speaking as the focus. The clip also includes continuity editing, also known as invisible editing, to produce an almost seamless string of video. Here is the finished product.
- Resovoir Dogs Task
On Saturday 25th January 2014, at 11:00 am, filming began for our Reservoir Dogs reenactment. Our first scene was the tracking shot of the group, walking down the small gradient. This was shot on Grove Hill in Harrow. This road resembles the one seen in the original opening and provided us with an accurate background to shoot the video. To achieve the tracking shot, the camera was positioned out of a car window. Once the car began to move, the group started walking down. Shooting the scene from the car provided a smooth gliding motion without the possible judders common with handheld tracking.This made it possible to shoot a scene very similar to the original opening, as you can see from the final product. It took approximately 40 minutes to shoot.
The next scene, or rather scenes, we took was the individual close-ups of each persons face, walking toward the camera. The same location was used, but unlike the 18mm-55mm lens used for the tracking shot, we used a 75mm-300mm telephoto lens instead for the close-ups, as we found it more suitable for setting up the correct framing. The camera was set up on a tripod to maximize stability when filming and zoomed up to about 150mm. As bigger lenses take longer to auto-focus, we decided to use manual focus when filming to reduce the likelihood of out of focus and unusable footage. After each shoot we previewed the footage to ensure it was suitable. Props used included a gold chain, sunglasses and toothpicks, which can be seen in the final video. Shooting the individual shots took approximately 1 hour.
The penultimate scene we shot was the very ending of the original. In this scene, the entire group walked away from the camera towards the road ahead. We shot this further down the same road at a T-junction, despite initially having another location in mind. To shoot this scene, we switched back to the 18mm-55mm wider lens and set it up on the tripod. After clicking record, we all got in position and walked toward the road. Although editing was relatively time consuming. As this was the most simple shot, it only took approximately 15 minutes.
The final scene we shot was in fact the first in the original opening video. The cafe scene was shot in a bar lounge about 5 minutes away from Grove Hill. The friendly owner invited us in and allowed us to film around the round table in his bar. This gave us all the resources we needed to shoot a scene resembling the one in the film.The scene took about 30 minutes to shoot and was a success. It took two takes and when we got the right shot, filming came to a conclusion. After thanking all participating actors for attending, we finished filming at 1:00 pm, 3 hours after starting. We had shot all the footage we needed, to make an accurate reenactment which pays attention to detail to the original. Overall it was a very enjoyable day, and after editing, the video produced was to a high standard of which we can be proud of. Here is the finished product:
What Ive Learned
From these two peliminary tasks, I had taken a lot of knowledge, tips and tricks that helped me in the making of the final product of my thriller, Breath. The continuity task taught me how to use the 180 degree rule. This is where shots of two objects, or in this case people, must not exceed a 180 degree angle. This clearly shows the audience that the two people are facing and talking to each other. Following the rule prevents conversation between characters from becoming confusing to the audience and makes the scene look professional. Although I have not used the 180 degree rule in my final product, I believe it has been beneficial in expanding my media knowledge of which I can take into my future projects.
In this preliminary task, I also learnt much about continuity or invisible editing. This is where action flows throughout each cut, with no elapsed time between frames. This technique is very useful in telling the story to your audience, as there are no jumps in time frame, and each cut begins as the previous one left. The result is one or more seamless cuts showing one action. A good example of this can be seen in 'The Job is Done', as the woman walks up to and opens a door, then sits down. Despite this being a simple action, it is portrayed through 5 cuts, all showing the continuous flow of that action. I also used this technique in my final product when showing the mysterious kidnapper getting in and out of the car. I believe this made it easier for the audience to understand what was going on in the scene.
Match on action was another feature of my first preliminary task. This is where an action, in this case the opening of a door, is shot from opposite angles. This is shown in my video, where we see the woman begin to open the door from one angle, and see her walking through from the other side of the door. I found this method works well in both my preliminary task and my thriller opening, where I used match on action whilst following the teenage boys bike ride. It is a technique that I am also likely to take into future media projects.
Whilst my continuity preliminary task gave me much to learn, the Reservoir Dogs reenactment gave me additional skills and learning curves which I could use to take into my final product. One of the first things I had to do is choose a location for filming the reenactment. I used Google Street-view to find a location which resembled the original film. This technique seemed to be very successful, as the filming location on my Reservoir Dogs task beared much similarity to that in the original video. As a result of this success, I decided also to use Google Street-view for selecting locations for my thriller opening. Fortunately, I concluded the most suitable location was centenary park, just around the corner from where I live. Despite this, Google Street-view had played a key part in finding a suitable place to shoot my final product.
As a perfectionist, I wanted to make my reenactment as close to the original as possible. This required accurate framing of each shot. To achieve this, I switched to the 75-30mm lens, as it not only gave me a better depth of field, but framed the shot better than my wider, 18-55mm lens. This proved that different lenses are suitable for different situations. This task made me put a great amount of thought into my lens selection, which I found a vital skill when filming my thriller opening. Whilst the wider lens allowed me to fit more into frame, the telescopic lens gave me a greater depth of field and far more zooming capabilities. Despite this, the telescopic lens requires a very steady hand or tripod, as it is more sensitive to movement, which despite the cameras built-in stabilization features, can cause shaky footage if moved even slightly. This effect is worsened the further the lens is zoomed in. This knowledge helped me in deciding which lens to use in different shots when filming Breath.
Another skill I had learned whilst filming my Reservoir Dogs reenactment is keeping my subjects in focus. Blurry or fuzzy footage can really detract from the clarity of a shot, and there is a very small margin of error. The most challenging sequence to film was the individual shots. This is because the subject was continually moving toward the camera, and the telescopic lens I was using could not auto-focus very quick, nor was the focal length very long. This meant my subjects kept going out of focus when moving closer to the camera. To prevent this, I had to switch to manual focus, which involved adjusting the focus of the camera using the end of the lens. This allowed me to keep the subject in focus at all times until they became too close for the camera to focus. This gave me a good opportunity to practice using some of the features of my DSLR, and the skills I learnt helped me achieve techniques such as focus pulls in my final product.
Getting the correct white balance made colour accurate within the reenactment. White balance is used to make sure colour recorded are truly representative of what they are in real life. Many cameras have the ability to automatically set white balance, but I decided to perform this manually. To do this, I held a white piece of paper in-front of the camera to show it what the colour of white looks like in the current lighting. This will adjust the colours recorded in shot to what they would be in real life. I did this before shooting my thriller opening to prevent misrepresentations of certain colours, especially of whites.
One of, if not the most challenging aspects of my Reservoir Dogs preliminary task was getting the actors together. I asked many people but their availability or willingness seemed to be a reoccurring problem. This resulted in us being 2 actors short for filming. From this, I learnt a valuable lesson, in confirming actors well in advance to the shooting of the film. This is what I did for my final product, ensuring they were available and willing to help me out weeks in advance. Thankfully they did not let me down, and some good came from the lack of actors during the filming of the Reservoir Dogs task, preventing disastrous consequences of an absence of actors.
Finally, one of the things that struck me about filming and editing the Reservoir Dogs reenactment was the time that was consumed in doing so. Initially, I rather naively thought that filming the shots that we required would be done within an hour. Filming in fact took 3 hours, and editing took far longer still. This rather surprised me as I before thought that filming and editing was not as time consuming as it really is. This discovery helped my accurately plan and schedule my thriller filming and editing. Sticking to this schedule would keep my work efficient, and keep me on track.
In conclusion, my preliminary tasks have helped me to a great extent in learning new techniques and skills of which I could implement into my final product Breath, and also carry this knowledge into future media projects.
Evaluation - Question 6
What have you learnt about technologies from the process of constructing this product?
In the making of my thriller film, I learnt a lot about the technologies that go into constructing a proffesional looking sequence. I used these technologies to my advantage in order to make my video as good as possible.
 The video editing software I used was Final Cut Express 4. This is a professionally used program specialising in the creation of high quality videos. It enables you to include many different video and audio effects/transitions, and is very versitile in enabling you to manipulate media in your timeline or even applying video filters. One I was done editing my video, I could export it in a variety of different formats and resolutions. I chose to export my thriller in the maximum 1080p resolution in a H.264 format that is YouTube friendly. With Final Cut I was able to create my film exactly how I had invisaged, and found the program a pleasure to work with despite its few flaws.
I also used Adobe After Effects CS4 and Soundbooth CS4 in building my video. I used after effects primarily to create animated text overlays and credits. It offered a collection of different animated transitions to choose from, that allowed me to create text that fitted the mood of the film. I also used After Effect's stabilization funtions to reduce unwanted shaking within some clips. Adobe Soundbooth I used for audio manipulation. I could add echos, reverb, and a whole host of other effects to the audio just in a few clicks of a mouse. An example of what soundbooth enabled me to do was at the very end of my opening, where the audio echo's to a silence. This effect was created on Soundbooth.

Filming my thriller also gave me an oppertunity to experiment with lighting. I found the correct lighting to be very important to the quality of the final product. Fortunately, much of my footage was shot outside on a rather sunny day, therefore light was adequete for filming. Inside however, artificial lighting was required. Not only did this make it easier for the audience to see what was going on, it also reduced visual noise and improved the quality of the image. Looking back at the beggining of my video, indoor scenes could have done with a bit better lighting, but this learning curve I can use to improve my future projects.
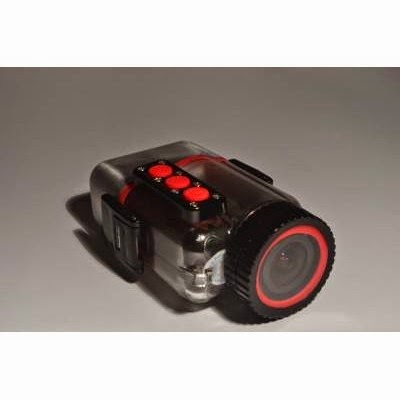 When filming Breath, I used a variety of equiptment to get just the right shots and angles. One of my most interesting peices of equiptment was my Mobius Actioncam in partnership with its custom made waterproof casing. The tic-tac box like size and shape of the camera made it perfect to acheive great action shots not possile with most other cameras. All shots on board the bike were filmed on the Mobius and was ofcourse used for the final, underwater shot. The versitility of the camera and the mounts it could be used with meant I could attach it to pretty much anything. Velcro mounts, headcam mounts, suction cup mounts and handlebar mounts are just some of the attachments I used to acheive certain angles. Despite its small size, it films in full 1080p at 30fps or 720p at 60fps, which is more suitable for extremly fast action.
Despite the actioncam being key in getting certain shots, it was not suitable for everything. When filming off the bike, I chose to record with my DSLR camera instead. Although recording in the same resolution, it provided more megapixels and a better depth of field, along with more pratical reasons like the fact you can instantly watch back your footage and it was easier to get a steady shot.
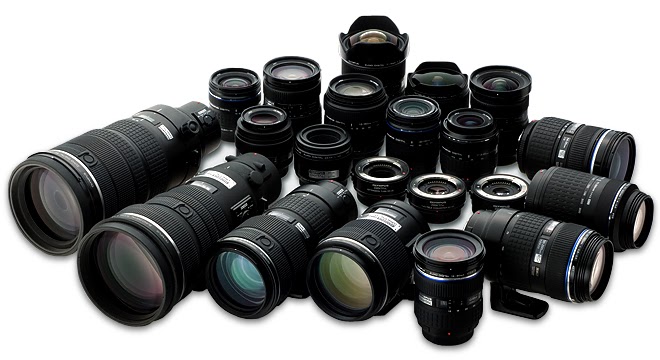
Another concideration I made was which lens I decieded to use for each shot. I used two lenses for my DSLR in my thriller opening. There were an 18-55mm and a 75-30mm teloscopic lens. My judgement was based on how far away the subject was, how still the camera needed to be and how much depth of ield was reccomended. Whilst the telescopic lens allowed me to zoom into objects from a lot further away and gave the shot a further depth of field, it also caused a very small judgement of error when stabilizing the shot, meaning one small jolt could ruin an entire shot. This problem worsens as you zoom further and further in, despite the cameras built-in stabilisation features. The majority of the shots were taken using the 18-55mm lens, as my subjects were generally close to the camera and I could capture wider angled shots, hence it was more suitable for the occasion.
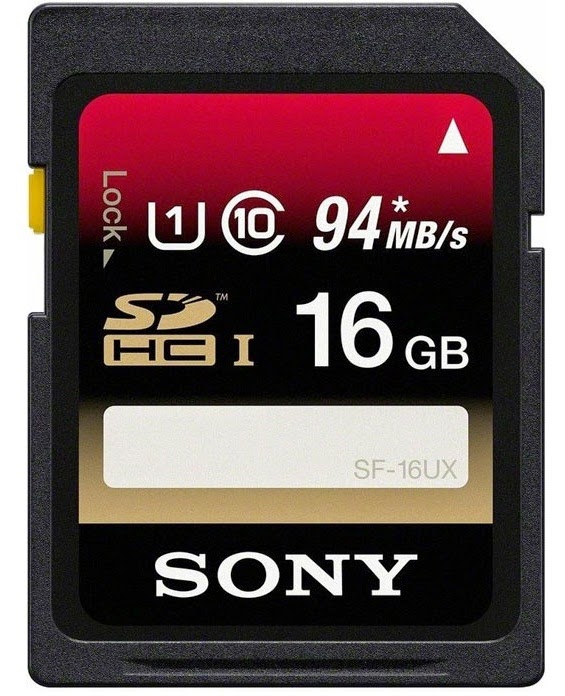
Finally, I had to make whilst filming my thriller opening is the memory of which I would store the footage on. I opted for a 16gb high speed SD card in my DSLR, and a class 10, 8gb mico SD in my mobius. This provided me with more than enough space to hold my footage and I could easily transfer the data from the cards to my computer at high speeds.
Friday 2 May 2014
Thursday 1 May 2014
Wednesday 30 April 2014
Tuesday 29 April 2014
Monday 28 April 2014
Evaluation - Question 1
In what ways does your media product use, develop or challenge forms and conventions of real media products?
My thriller opening generally follows many trends found in thriller openings from similar movie genres. I have understood and incorporated various media conventions in my opening, giving it the sense of suspense, tension and anticipation, giving the audience feelings of which I aimed to generate. Like many similar genre films, it starts with an action-packed chase involving an innocent teenage boy, being followed by a mysterious man we know very little about. The chase is a very common feature in action movies, such as the latest installment of James Bonds, Skyfall. Whilst on a far lower budget, my thriller opening aims to create the same sense of excitement and suspense as Skyfall created in the fist few opening minutes. Here is the opening of Skyfall, used to inspire my thriller opening.
The idea of a protagonist and victim is also a known thriller convention. The victim, being played by the teenage boy, is on a simple bike ride around his local park, which ends in plotted murder carried out by the protagonist, a suited, mysterious man. this poses similarity to films in the genre, with their being a good guy a bad guy, much like in the Skyfall extract above. The audience instantly roots for the good guy (or victim in this case), and the film generally ends in them being triumphant over the villain.
One of the most important features of a good thriller opening is to intrigue the audience and make them want to see more. This is exactly the feeling I would like leave my audience with once they finish watching my thriller opening. To do this, I tried to create an enigma, a state where my audience will be asking many questions about who the people are, what they are doing and why they are doing it. The feeling of borderline confusion means I can trigger my viewers inner curiosity, encouraging them to continue watching. This method I have adopted by analyzing film openings in similar genres to mine. It may be evident throughout my opening sequence, that despite their being diegetic sound, there is no dialogue whatsoever. This is a good way to build mystery as very little is given away about the protagonist in particular. This adds to the sense of enigma I was intending to create.
Using the Skyfall extract as an example, high-tempo thriller openings almost always incorporate little or no video transitions in preference to simple cuts. This is to build a significant feeling of suspense, urgency and tension resulting in a climax of the boy being forcefully removed from his bike without explanation and thrown into the boot of the protagonists car. Through the loudening soundtrack and thoughtfully cut video, I was able to allow the audience to anticipate an event through audio and visuals alone. This was one of the biggest successes of my thriller, as I was able to capture the same emotions felt by my audience during my opening as in higher budgeted films.
Finally, the selection of my overlaid text during my film was also crucial in setting the scene. An appropriate choice of text was used to reflect the mood. The text can subconsciously take away from the seriousness and intensity set, and it is very important that the design and theme of text is chosen correctly. The text inserted in my opening generates a rather sinister, horror feel, resembling the dark intentions of the mysterious man in the suit pursuing the innocent boy in the sequence. Whilst all thriller openings include titles, not all get it right. This can take away from the intense experience that you may aim to create. The order of text shown can also be significant in defining key differences between your opening with a trailer.
My thriller opening follows various conventions which combined, make my opening a captivating piece which sends all the right impressions to my audience to create the emotions I intended to portray.
Saturday 26 April 2014
Wednesday 23 April 2014
Breath - Rough Cut
This is the rough cut and latest edit of my thriller opening, Breath. Some alterations and additions are yet to be made.
Saturday 8 March 2014
The Filming of Breath in Pictures
The majority of the filming of Breath was done on Saturday 8th March 2014. Here is a few pictures taken on the day of the recording.


Breath Filming Preparation - Tracking Shot
In preparation for my thriller 'Breath', I tested out ways in which I could achieve a smooth, professional looking tracking shot on a budget. As a professional camera dolly went into the thousands of pounds, I thought of another, far cheaper method of achieving the high standard tracking shot I am aiming for. I used and old skateboard and a 3 meter by 20cm plank of wood. The wood is long enough and wide enough for the skateboard to glide across it, to give a smooth and fluid movement. I first tried testing this method with corrugated cardboard, but this made the camera shaky as it ran over small lumps on the material. With the woods smooth finish, I was able to place my camera onto the skateboard an achieve a smooth sideward glide. The video below shows the difference in footage when shooting gliding over corrugated cardboard and wood.
Looking back at the footage, I chose to run on wood. The equipment cost me £5 altogether, the skateboard being £3 from a car boot sale and wood being £2 at a wood off cut shop. This made the set up a worthwhile investment and far from the £1,000 to £2,000 price bracket of professional grade camera dolly's. Below are pictures of my homemade tracking set up.


Looking back at the footage, I chose to run on wood. The equipment cost me £5 altogether, the skateboard being £3 from a car boot sale and wood being £2 at a wood off cut shop. This made the set up a worthwhile investment and far from the £1,000 to £2,000 price bracket of professional grade camera dolly's. Below are pictures of my homemade tracking set up.
Breath Filming Preperation - Underwater Footage
The final scenes of my thriller opening incorporates some underwater footage. This is meant to show a body being thrown into a lake. To do this, I got my hands on a waterproof case for my action camera. Unfortunately, finding a nearby lake was not as easy. This got me thinking, Instead of going to a lake, why not take the lake to us. And thats what I did. To simulate a river, I filled a large paddling pool full of water.

You may be thinking, that water looks dirty. In fact this was done on purpose. When initially filling up the pool, I figured that rivers are generally quite murky. At that point, the water was crystal clear. The solution? Gravy!

By dissolving 4 buckets full of gravy in the water, I was able to make the water have the brown tinge, common in rivers. Despite the hurdles I had to overcome my ambitious idea made the water a rather accurate simulation of a river. To test the underwater footage, I dropped my waterproof camera into the pool. This was the result.
You may be thinking, that water looks dirty. In fact this was done on purpose. When initially filling up the pool, I figured that rivers are generally quite murky. At that point, the water was crystal clear. The solution? Gravy!
By dissolving 4 buckets full of gravy in the water, I was able to make the water have the brown tinge, common in rivers. Despite the hurdles I had to overcome my ambitious idea made the water a rather accurate simulation of a river. To test the underwater footage, I dropped my waterproof camera into the pool. This was the result.
Friday 7 March 2014
Breath Filming Preparation - Bike Camera Angles
My thriller opening is very much focussed on a young boy riding on his bike. As I need multiple shots og him riding his bike from various interesting angles and perspectives, I attached my camera to different places on the bike to see what shots look good, and worthy of being incorporated into my final cut. Here is a video of my favourite camera angles that were taken and are likely to be found in my thriller opening.
Breath Filming Preparation - Camera Equipment
To film my opening, there are three essential pieces of equipment; A DSLR, a waterproof camera and a Tripod. As filming approaches, I needed to make sure i met these requirements if nothing else. My DSLR camera, the Sony A37 I will be using to film the bulk of my opening. It is just over 16 megapixels and should provide plenty of depth and clarity to make my open in have the cinematic feel. Partnered up with a 18mm-55mm standard lens, I may also be using a 75mm-300mm lens for shots further away or ones which require a more eventuated depth of field. With this camera I will be shooting in 1080p full HD 30fps, in MP4 format rather than AVHD for editing convenience.

For the action shots I will be using the Mobius action-cam. This camera is about the size of a Tic-Tac box and weighs at very little too. Despite its small stature, it too will shoot in 1080p 30fps. It can be attached via various mounts, including bike mounts, head mounts and various other ways to attach it to pretty much anything. I will be using some of these mounts to achieve some particularly challenging shots in my thriller, as it is capable of what DSLR's are not. In the picture below it is also wearing its waterproof case, which makes it withstand up to 30 meters of water. This is perfect for my thrillers finale, where it will get thrown into a pool of water.

Finally, I will be using my own tripod. Like the DSLR itself, it is also Sony, and will come in very handy when keeping the camera stable. The tripod incorporates a built-in remote on the handle, which allows me to stop and start recording or adjust the zoom without touching and potentially jogging the camera. It uses a universal tripod mount compatible with both my Sony and Mobius cameras.

Wednesday 5 March 2014
Wednesday 26 February 2014
Film Ratings
To prevent the display of inappropriate content to younger audiences, all film are rated. This rating system is generally divided into 6 categories; U, PG, 12A, 12, 15 and 18. I believe my thriller, Breath, will be rated a 12, due to its mild violence and threat. Despite it being a kidnapping, carefully selected material will mean there will be no excessive violence and gore, making it suitable for children aged 12 or over. I did this to broaden my target audience in an attempt to make it more widely available and successful. Below are the guidelines on which I based my decision, found on www.bbfc.co.uk.


For more information on movie rating guidelines, refer to the PDF in the link below:
Locations, Props and Costumes
Locations
Centenary Park - Centenary park is located in the North West London borough of Harrow. This is a convenient place to shoot as not only does it meet all of my requirements for filming and scenery, but its is just 0.3 miles from my house. This makes it the perfect choice for my thriller opening.
Inside of a Car - I have no preferences as to what type of car the opening is filmed in as it is rather irrelevant. Thankfully I know a relative willing to let me use their car for filming. This is to film the kidnapper whilst driving toward the park and throwing the kidnapped boy in the car boot.
Lakeside - The location of a lakeside is yet to be found, as it seems I may have to go out of my way in order to film the particular scene. As there is no real options within a reasonable radius, I will have to look further afield.
Props
Bike - The bicycle is one of the main focal points of the opening. The boy will be riding this around his local park before being kidnapped by the mysterious man. I will attach the camera onto the bike for many different angles of the boys journey, and could even use the bike for tracking shots, as it will provide a smoother movement of the camera.
Car - The kidnapper will be driving the car to and from the park in his car. I have already found someone willing to let us film in their car. The car also plays a big part in the opening scene and again I will mount my camera in various places to achieve my desired effect.
Costumes
Black suit and tie - The kidnapper will be wearing a black suit and tie to give him the professional hit man look that I am after. I believe that it is essential that he wears this costume as it adds to his mysterious image.
Casual teenage clothing - I would like the boy riding the bike to come across as your everyday teenager. Despite the kidnapping he gets caught up in, its important to emphasise he leads are regular and ordinary teenage life. This will emphasise the enigma. To achieve this, I would like the boy to wear ordinary clothing to show the viewers that he is no different to them, just normal people.
Friday 14 February 2014
Breath - Updated Treatment
About the Film
Breath is a Action/Crime Thriller involving a teenage boy, and a professional hit man we know nothing about. The opening involves the abduction of a young boy along with plenty of action, sure to keep the audiences attention. Through the events of the opening. We create a sense of enigma, as many unanswered questions are raised about the man kidnapping the boy.. Who is he? What is he doing? Why is he doing it? and Will he be successful?
The Action
The opening is a very eventful scene. We cut back and forth between the mysterious man and the teenage boy. As the boy prepares to enjoy a bike ride, the man is behind the wheel of a car. We closely follow the two characters as they both make their way to the park, with seemingly innocent intentions. As we get various angles of the bicycle riding through the park, we see a man also in a suit sitting on a bench. We later find out that this is just to throw the audience. We then track the actions of the hit man, as he pulls the boy from the bike, ties him up, to the horror of the witnesses. We then with a low angle shot of the body being dragged up to and thrown into a car boot. The scene finishes with the abducted boy thrown into a nearby lake, followed by the film title 'Breath'.
Themes
During the film opening, I want the audience to travel a roller coaster of feelings. Although from the beginning it seems like an every day bike ride, it ends in a chilling and unexplained kidnapping. During this transformation, the audience will be experiencing fear and sympathy for the vulnerable young boy. This feeling is amplified by the fact that the boy seems to originate from a loving, caring family of which he lives a happy and successful life.
The Narrative
The opening follows events that all happen simultaneously. Although time frame between events are the same, a time lapse, slow-motion and rewind footage will be included to add to the drama. There will be no dialogue whatsoever but both diegetic and non-diegetic sound is used. Non diegetic sound will include intense background music and sound effects, and diegetic sounds will be footsteps, bike sounds and the body being thrown into the lake.
The Characters
There are two main characters in my thriller opening. One of them is a your average 13-15 year old white, male teenage boy. He we need the ability to ride a bike. The second main actor will a white 30-40 year old man, who will be the kidnapper. He will need to wear sunglasses, a suit and tie to give him the professional and mysterious look I am after. He needs to have the ability to drive a car. There also needs to be another almost identical man in the opening to mislead the audience into thinking they are in fact the culprit of the kidnapping. Other than the two main protagonists there will be few actors required to film.
Setting
The opening will be filmed mostly in centenary park, as this is an ideal and convenient location for filming as It provides and meets all the requirements of what I need. I also need a car and a lakeside setting. These locations are yet to announced.
Mise en Scene
At the start of the opening, the cyclist begins his journey at home. Here he will be surrounded by family pictures and other sentimental props relating to family life. As previously stated, the kidnapper must be wearing a black suit, white shirt, a tie and sunglasses, giving his his villainous look. Other than this, there is little significant mise en scene, due to a large part of the opening taking place in the park. Despite still being important in making the viewers imply and feel certain ways during the scene, mise en scene takes little part in this particular thriller.
Camerawork
I would like to add a variety of unique and interesting camera angles, and utilize the filming equipment I have to their full potential. A time lapse, helmet cam, underwater shot, tracking shot, slow motion, low, high and long shot are some of the few camera angles and shots I will be using in my thriller opening to create the best viewing experience possible. By including such a variety of shots, I can create the desired effects. To film I will be using the Sony A37 SLR/SLT camera and a more portable Mobius Action camera, both shooting in full 1080p HD. I will also be using a tripod for maximum stability and various mont to create extreme and POV shots.
Editing
In my thriller, the editing will be key to its success. As I want the opening to be high tempo and build up the tension, it will include a series of cross-cuts, crossing between the murderer and victim. This fast paced editing will build that fear factor I look to capture, and show multiple events in the same time frame. Little or no animated transition will be used between each shot to give the opening a more intense and frantic feel. Despite the lack of transitions, I will be using screen splitting to shot different events simultaneously with the obvious addition of text for credits and the film title. Doing all this effectively will be a crucial part in making my opening have the desired effect on my audience.
Audience
My target audience is anyone between 12 to 35 years old who have an interest in action packed crime thrillers. The film is unisex and not aimed at a specific gender, but is not suitable for viewers below the age of 12 due to violence present in some scenes. There is currently a big market for thrillers of this genre, and recent action thriller like Skyfall have become hugely successful critically and financially. This proves there is a keen interest within the genre, of which I can specifically target.
Storyboard
Title
Thursday 13 February 2014
Storyboard Animatic
Here is my thriller opening Breath in an animatic. This will loosely reflect my final product.
Wednesday 12 February 2014
Thriller Pitch Feedback
Here is me presenting my thriller pitch to the class, along with the constructive feedback I got from them.
Tuesday 11 February 2014
Wednesday 5 February 2014
The Making of Reservoir Dogs
On Saturday 25th January 2014, at 11:00 am, filming began for our Reservoir Dogs reenactment. Our first scene was the tracking shot of the group, walking down the small gradient. This was shot on Grove Hill in Harrow.


This road resembles the one seen in the original opening and provided us with an accurate background to shoot the video. To achieve the tracking shot, the camera was positioned out of a car window. Once the car began to move, the group started walking down. Shooting the scene from the car provided a smooth gliding motion without the possible judders common with handheld tracking.
This made it possible to shoot a scene very similar to the original opening, as you can see from the final product. It took approximately 40 minutes to shoot.
The next scene, or rather scenes, we took was the individual close-ups of each persons face, walking toward the camera. The same location was used, but unlike the 18mm-55mm lens used for the tracking shot, we used a 75mm-300mm telephoto lens instead for the close-ups, as we found it more suitable for setting up the correct framing.
The camera was set up on a tripod to maximize stability when filming and zoomed up to about 150mm. As bigger lenses take longer to auto-focus, we decided to use manual focus when filming to reduce the likelihood of out of focus and unusable footage. After each shoot we previewed the footage to ensure it was suitable. Props used included a gold chain, sunglasses and toothpicks, which can be seen in the final video. Shooting the individual shots took approximately 1 hour.
The penultimate scene we shot was the very ending of the original. In this scene, the entire group walked away from the camera towards the road ahead. We shot this further down the same road at a T-junction, despite initially having another location in mind.
To shoot this scene, we switched back to the 18mm-55mm wider lens and set it up on the tripod. After clicking record, we all got in position and walked toward the road. Although editing was relatively time consuming. As this was the most simple shot, it only took approximately 15 minutes.
The final scene we shot was in fact the first in the original opening video. The cafe scene was shot in a bar lounge about 5 minutes away from Grove Hill. The friendly owner invited us in and allowed us to film around the round table in his bar. This gave us all the resources we needed to shoot a scene resembling the one in the film.
The scene took about 30 minutes to shoot and was a success. It took two takes and when we got the right shot, filming came to a conclusion.
After thanking all participating actors for attending, we finished filming at 1:00 pm, 3 hours after starting. We had shot all the footage we needed, to make an accurate reenactment which pays attention to detail to the original. Overall it was a very enjoyable day, and after editing, the video produced was to a high standard of which we can be proud of.
Reservoir Dogs Opening
Here is the completed Reservoir Dogs Opening reenactment. Refer to the bottom left of the video to see how this matches up to he original.
Tuesday 4 February 2014
The Usual Suspects Analysis
In this analysis I will be looking at the 1995 film, The Usual Suspects. This highly rated picture is a Crime/Mystery thriller, full of twists and turns sure to get you chilled to the bone. Starring Stephen Baldwin, its has an average film rating of 8.7, putting it in the top 500 films of all time. I will be looking at the opening of the film, from the entire extract provided at the bottom of the post. I shall be specifically looking at four micro-elements; mise en scene, camerawork, editing and sound. In each point I will be referring to pictures found toward the bottom of the article.
The scene begins in a very dark and aery location. Although we can see very little in the shot, we hear and notice a man, lighting matches in order to light his cigarette (Picture 1). This seems to be the only source of light in the picture, but is enough to get an idea of what the man looks like. The scene does not give much away and leaves an enigma of unanswered questions despite being at the very beginning of the opening. As the camera slightly pulls out, we see seemingly uncontrolled flames in the background, creating a sense of danger.
Following on from the first few seconds, the man then throws his flaming matches on the floor beside him, which to our surprise ignites a rope. The camera then tracks the path of the rope, and we watch the flames progress in its journey (Picture 2). Throughout this and the previous scene, a non-diegetic and dramatic violin soundtrack is played in the background, creating a gloomy setting for the already dark location.
As we continue to watch the rope set alight, the flames illuminate a clear image of a dead, lifeless body in the background (Picture 3). This is of obvious significance, and raises yet more questions. Who is he? Why was he killed? Who killed him? At this point, we can only presume the man who had just lit his cigarette is the killer, but in fact, we later find this is not the case. The inclusion of this shot is a clever one, as it builds up to the situation in hand. Its a little hint of the story line.
We then get a close-up shot of the still progressing flames (Picture 4). as they creep towards the camera, a clear liquid is poured over the rope from above and the diegetic sound of it splattering onto the ground below, in order to douse the raging flames and stop them in their path. The camera then pans upward to show the silhouette pouring the liquid from the raised balcony. Instantly his higher position shows his dominance and power over the man below. The man on the balcony of which we know nothing about, is cast in a very mysterious way,which gives the viewer the impression that he is in fact the villain in this scene.
We then cut back to the man previously seen at the start of the opening, who is now looking weak and tired, hanging his head whilst watching his attempt at killing himself intercepted and quite literally, fizzle out (Picture 5). Contrary to the viewers previous thoughts, the man pictured from the very start of the scene seems to have very little or no power at all in this situation. As the mysterious man walks down the series of steps to approach the man below, the weak man asks "What's the time?" Of which the mysterious man replies "12:30", and soon after, "Are you ready?". The man looks up to the mysterious one, eventuates the division in power. Through a close up of the helpless mans face shows, he seems to have little hope left and knows his fate will be the same as the dead man seen earlier on.
In the next shot, the man of which we still know nothing about, pulls out his pistol and points it at the vulnerable and injured man (Picture 6). This proves the man fears were right, and proves who killed the dead man seen in the previous scene. The mysterious man is confirmed as the villain, as we wait to hear the loud bang of the gun being fired. As this happens, we cut to an establishing shot of the outside of the boat they are in, and a montage like series of cuts give us an idea of the scenery around the location. We see very little aftermath of the gun shot. Its also relevant to point out we have yet to, and don't see the villains face, and know almost nothing about him other than that he is a ruthless killer.
As we return inside the boat, immediately after the drama has taken place, a close-up of the murderous protagonists hand, dropping his lit cigarette to re-light the fire he earlier put out (Picture 7). The reflective shine already on the floor suggests that some kind of lighting fuel has been used to encourage the fires spread. This ignition causes the rope to once again light.
Once again the camera follows the fire as it progresses down the rope (Picture 8). We experience some kind of Da Ja Vu, as the scene seemingly replays the earlier one, as the flames illuminate the newly dead body, only this time it is the victim seen throughout the first half of the opening. From this we get a sense that there are more victims to the crazy murderer, yet we still do not know why he has killed these people. This nagging question remains unanswered throughout the opening scene.
The opening concludes with a mighty explosion, as the flaming rope reaches its explosive target (Picture 9). This only adds to the deadly mayhem and confusion as to whats going on. This is what makes the opening successful, as the only way to answer these questions is to continue watching the movie. This is what the opening aims to do, and can be the key to a successful film.
 4.
4.
 6.
6.
 8.
8.
The scene begins in a very dark and aery location. Although we can see very little in the shot, we hear and notice a man, lighting matches in order to light his cigarette (Picture 1). This seems to be the only source of light in the picture, but is enough to get an idea of what the man looks like. The scene does not give much away and leaves an enigma of unanswered questions despite being at the very beginning of the opening. As the camera slightly pulls out, we see seemingly uncontrolled flames in the background, creating a sense of danger.
Following on from the first few seconds, the man then throws his flaming matches on the floor beside him, which to our surprise ignites a rope. The camera then tracks the path of the rope, and we watch the flames progress in its journey (Picture 2). Throughout this and the previous scene, a non-diegetic and dramatic violin soundtrack is played in the background, creating a gloomy setting for the already dark location.
As we continue to watch the rope set alight, the flames illuminate a clear image of a dead, lifeless body in the background (Picture 3). This is of obvious significance, and raises yet more questions. Who is he? Why was he killed? Who killed him? At this point, we can only presume the man who had just lit his cigarette is the killer, but in fact, we later find this is not the case. The inclusion of this shot is a clever one, as it builds up to the situation in hand. Its a little hint of the story line.
We then get a close-up shot of the still progressing flames (Picture 4). as they creep towards the camera, a clear liquid is poured over the rope from above and the diegetic sound of it splattering onto the ground below, in order to douse the raging flames and stop them in their path. The camera then pans upward to show the silhouette pouring the liquid from the raised balcony. Instantly his higher position shows his dominance and power over the man below. The man on the balcony of which we know nothing about, is cast in a very mysterious way,which gives the viewer the impression that he is in fact the villain in this scene.
We then cut back to the man previously seen at the start of the opening, who is now looking weak and tired, hanging his head whilst watching his attempt at killing himself intercepted and quite literally, fizzle out (Picture 5). Contrary to the viewers previous thoughts, the man pictured from the very start of the scene seems to have very little or no power at all in this situation. As the mysterious man walks down the series of steps to approach the man below, the weak man asks "What's the time?" Of which the mysterious man replies "12:30", and soon after, "Are you ready?". The man looks up to the mysterious one, eventuates the division in power. Through a close up of the helpless mans face shows, he seems to have little hope left and knows his fate will be the same as the dead man seen earlier on.
In the next shot, the man of which we still know nothing about, pulls out his pistol and points it at the vulnerable and injured man (Picture 6). This proves the man fears were right, and proves who killed the dead man seen in the previous scene. The mysterious man is confirmed as the villain, as we wait to hear the loud bang of the gun being fired. As this happens, we cut to an establishing shot of the outside of the boat they are in, and a montage like series of cuts give us an idea of the scenery around the location. We see very little aftermath of the gun shot. Its also relevant to point out we have yet to, and don't see the villains face, and know almost nothing about him other than that he is a ruthless killer.
As we return inside the boat, immediately after the drama has taken place, a close-up of the murderous protagonists hand, dropping his lit cigarette to re-light the fire he earlier put out (Picture 7). The reflective shine already on the floor suggests that some kind of lighting fuel has been used to encourage the fires spread. This ignition causes the rope to once again light.
Once again the camera follows the fire as it progresses down the rope (Picture 8). We experience some kind of Da Ja Vu, as the scene seemingly replays the earlier one, as the flames illuminate the newly dead body, only this time it is the victim seen throughout the first half of the opening. From this we get a sense that there are more victims to the crazy murderer, yet we still do not know why he has killed these people. This nagging question remains unanswered throughout the opening scene.
The opening concludes with a mighty explosion, as the flaming rope reaches its explosive target (Picture 9). This only adds to the deadly mayhem and confusion as to whats going on. This is what makes the opening successful, as the only way to answer these questions is to continue watching the movie. This is what the opening aims to do, and can be the key to a successful film.
1.
 |
| 2. |
 |
| 3. |
4.
5.
6.
7.
8.
9.
Extract
Subscribe to:
Posts (Atom)